How to Install a Hose Reel Wall Mount System
Tools Required
- Stud finder
- Tape measure
- Pencil or marker
- Drill
- 3/16" drill bit (for wood studs)
- 5/16" masonry bit (for concrete)
- Phillips screwdriver
- 13mm, 15mm, and 16mm ratcheting wrenches
- Level (recommended)
- Torque wrench (recommended)
- Hammer (for concrete bolt installation)
1A. Mounting to 16” Wall Studs
- Use a stud finder to locate two adjacent 16" studs.
- Mark four drill points (two per stud), spaced 16" apart horizontally and 5.9" vertically.
- Drill four pilot holes using the 3/16" bit.
- Insert screws, leaving about 1/5" gap from the wall.
- Hang the mounting plate on the screws, then tighten them flush.
- Use a wrench and torque wrench to fully secure the plate.
1B. Mounting to 24” Wall Studs
- Secure two horizontal 2x4 planks (about 28" long) across the studs.
- Leave 5.9" between the bottom edges of the planks.
- Follow the same mounting steps from the 16" stud method.
1C. Mounting to Concrete Walls
- Mark four drill points and drill 5/16" holes to 2.75" depth.
- Tighten the nut on each expansion bolt so it extends 3/4" past the cone.
- Remove the hex nut, spring washer, and flat washer from each bolt.
- Hang the mounting plate on the bolts and reassemble the washers/nuts.
- Tighten everything securely using appropriate tools.
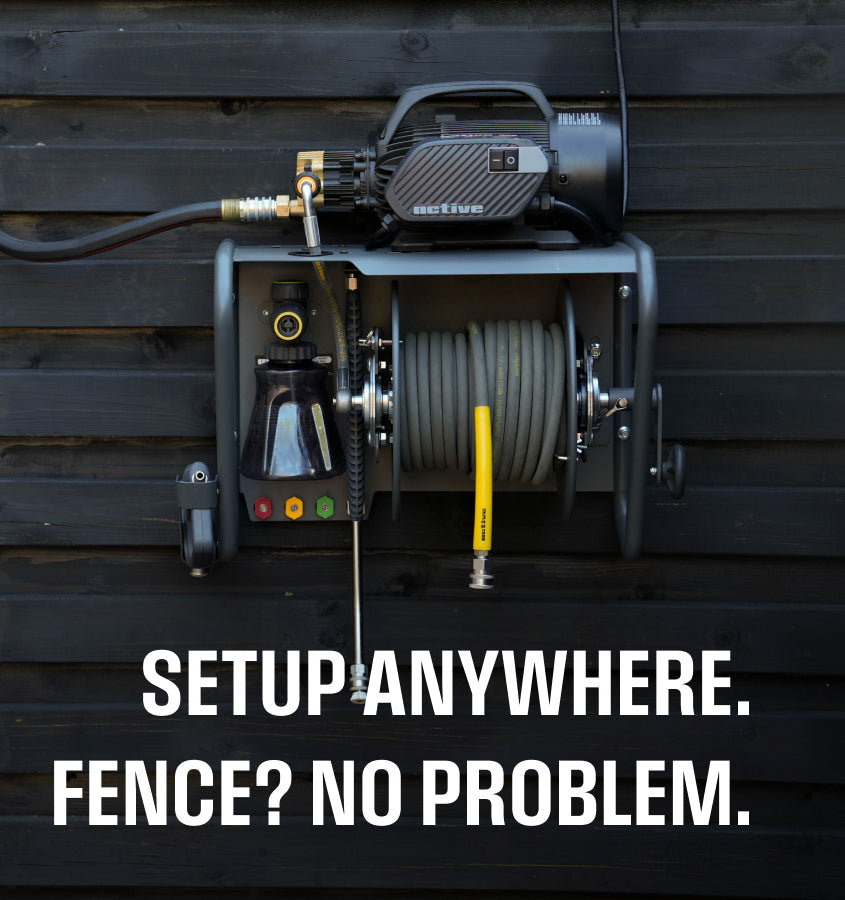
Step 2: Attach the Hose Reel Bracket
- Align the hose reel frame holes with the mounting plate slots.
- Secure with the included bolt and nut set.
- Ensure the reel is square before tightening completely.
Step 3: Install the Gun Holster
- Use a Phillips screwdriver and included screws.
- Mount the holster to the side of the wall plate.
- Ensure it sits flush and secure.
Step 4: Attach the Handle Crank
- Slide the handle pin through the crank into the reel barrel slot.
- No tools required—simple push-fit installation.
Step 5: Install the Hose
- Pull out the reel lock pin and rotate it 90° to unlock.
- Rotate the reel so the opening faces forward.
- Attach your hose to the quick-connect fitting.
- Secure the hose with the included clamp on the right side of the reel.
- Wrap the hose neatly and relock the reel once coiled.
Step 6: Mount Your Pressure Washer
- The shelf fits the Active 2.0 and 2.3 models (optional feet kit recommended).
- For other washers, drill four 11mm holes in the shelf.
- Place the unit on the shelf and align with holes.
- Use M8 x 20mm bolts to secure the motor and pump assembly.
- Attach the jumper hose from washer outlet to reel inlet.
Step 7: Organize Accessories
- The reel holds up to 100 ft of 3/8" hose. Use an adapter if your hose lacks a 3/8" male plug.
- Nozzles store in the four small slots on the mount.
- Lance, foam cannon, and spray gun have designated spaces on the mount or holster.
Wrap-Up
With your wall-mounted hose reel system installed, your pressure washing setup is more efficient and organized. Whether you're mounting on studs or concrete, this setup supports long-term use and flexibility for accessories and maintenance.
Need help or have questions? Contact us at support@activeproducts.com.